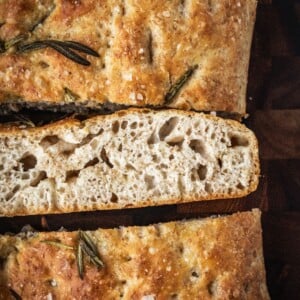
This No Knead Whole Wheat Focaccia Recipe is a spin on my standard focaccia recipe. It uses a combination of whole wheat flour and all-purpose. This recipe does take some time to prepare (mostly hands-off) but the final baked focaccia will be worth the wait. The base recipe needs just 6 ingredients that you probably have in your pantry right now!
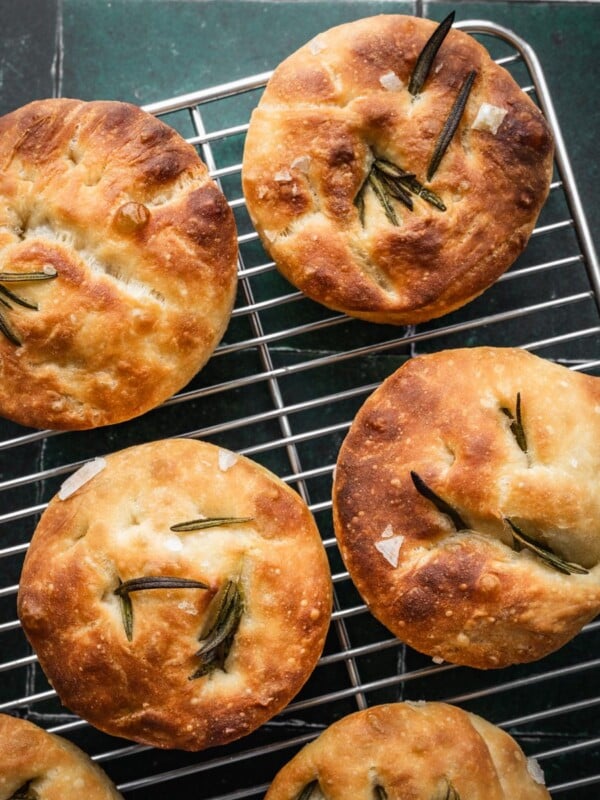
Make sure to also try some of my other focaccia recipes: fig and onion focaccia, caramelized onion focaccia, focaccia pizza, olive zaatar focaccia, tomato focaccia and jalapeno cheddar focaccia. Baking for one? Try my small batch focaccia in muffin form!

Table of Contents
Ingredients
The recipe comes together with basic pantry staples that you probably have right now.

- Flour: I like to use 50% white all-purpose flour (unbleached preferred) and 50% whole wheat flour. I don’t recommend going beyond the 50% with whole wheat, as anything more will yield a much less fluffy focaccia. Also, try my no knead whole wheat loaf recipe.
- Yeast: I like to use Instant yeast when making no knead bread, but dry active yeast will work just fine too. Just make sure to bloom it in the water for a few minutes before making the dough. You can also use fresh yeast but do adjust the quantity. When using fresh yeast instead of dry, use double the amount by weight.
- Olive Oil: It wouldn’t be a focaccia without olive oil. This recipe uses quite a bit of oil. You can reduce the amount slightly but keep in mind a traditional focaccia is supposed to be slightly oily. Good quality olive oil is a must.
- Fresh Herbs: The choice is yours here. I am using rosemary in this basic recipe, but if you check out my other no-knead focaccia recipes you’ll see that I use other herbs as well.
See the recipe card for full information on ingredients and quantities.
How to Make this No-Knead Focaccia Recipe
This recipe is not difficult, but I recommend that you read through all the steps before you start.

Step 1. Mix: To a large bowl, add the white flour, whole wheat flour, salt, yeast, olive oil and room temperature water (Images 1-2). Mix with a wooden spoon until all the flour is hydrated. The mix should be shaggy but not sloppy (Image 3).
Step 2. Rise: Drizzle some olive oil over the surface of the dough, cover the bowl with plastic wrap or a tight-fitting cover and refrigerate overnight (Image 4).

Step 3. Deflate and shape: 2 hours before you want to bake the tomato focaccia, take the bowl out of the fridge and uncover it (Image 5). Using your hands deflate the dough slightly and transfer the dough to an oiled baking tray (9×13) or sheet pan (Image 6). Shape it loosely by grabbing each end and folding it over like you would a letter. Flip the dough over so the seams are on the bottom (Image 7). Cover the tray with a towel and set aside for 1.5-2 hours (Image 8).

Step 4. Dimple. Preheat your oven. The dough should now have spread covering the surface of the baking tray (Image 9). Drizzle more olive oil over the dough and start dimpling with your fingers, covering the entire surface (Image 10). This creates valleys and mountains in the dough and you should also see some air bubbles forming.
Step 5. Dress. Nestle your rosemary and sprinkle with flaky salt (Image 11).
Step 6. Bake. Bake in the preheated oven for 20-25 minutes, until golden brown (Image 12).
Step by Step Video Tutorial
Why You Should Use a Kitchen Scale
In this recipe, I provide both American (Imperial) measurements (cups and tea/tablespoons) as well as standard measurements by weight. I have tested this recipe at least a dozen times by using a kitchen scale and it turns out beautifully every time.
If you were to use cups, you might not get an accurate measurement. For example, a standard cup of flour is supposed to weigh about 120 grams. However, depending on how you pack the flour, it can actually weigh upwards of 170 grams. That is a significant variation that will affect the final bake.
I strongly recommend that you use a kitchen scale (affiliate link) when baking. You get a much more consistent result.

Expert Tips
- Don’t Hurry the process. Allow the dough to rise in the fridge for at least 18 hours and you’ll need 2-4 hours for the second rise. The timing will depend on the temperature in your kitchen and how active the dough is. That being said, plan ahead! Try some of my other no-knead recipes like no-knead white bread and no-knead whole wheat bread.
- Parchment paper: Line your baking sheet or baking pan with parchment paper for easy cleanup. Don’t use aluminum foil as it will stick to the bread!
- BUTTER THE PAN! Ok, this might be my best focaccia baking tip to date. Before you oil the pan, butter it. The butter creates a later between the pan and the dough, making it so incredibly easy to remove the bread from the pan once baked.
- Let it cool! Don’t cut into the bread right after it comes out of the oven. The hot steam can make it gummy. Wait at least 30 minutes before you cut into it.

Recipe FAQs
This is the ultimate make-ahead recipe because you can prepare the focaccia dough and refrigerate it for up to 2 days. Just make sure that it is covered with plastic wrap so that it does not dry out.
Once baked, the focaccia can be stored in an airtight container in the fridge for up to 3 days. You can also freeze focaccia slices in freezer bags or freezer-safe containers for up to 6 months and reheat in the oven or toaster oven when want to enjoy it.
Yes, you can certainly use dried herbs when making focaccia. You can incorporate them into the dough or top your focaccia with them. Do be careful as dried herbs tend to burn. So if you do use dried herbs, make sure to use them in conjunction with other ingredients like cheese.
Other Baking Recipes
If you make this No Knead Whole Wheat Focaccia or any other baking recipes on Urban Farm and Kitchen, please take a moment to rate the recipe ⭐⭐⭐⭐⭐ and leave a comment below. It’s such a help to others who want to try the recipe.
For more Urban Farm and Kitchen, follow along on Instagram, Facebook, and Pinterest, visit the Urban Farm Shop, or subscribe for new posts via email.
No Knead Whole Wheat Focaccia Recipe
Equipment
- 9×13 Baking pan or large rimmed baking sheet – Affiliate link
- Kitchen Scale – Affiliate Link
Ingredients
For the Dough
- 2 cups All-purpose flour – 260 grams – Bread flour can also be used
- 2 cups Whole wheat flour – 260 grams
- 2 tsp Kosher salt – 10 grams
- 2 tsp Instant yeast – 7 grams
- 2 tbsp Extra virgin olive oil – 28 grams (Plus extra for drizzling)
- 2 cups Lukewarm water – 473 grams
For Baking and Garnish
- 1 tbsp Butter – For greasing the pan
- ¼ cup Extra virgin olive oil, divided – for greasing the tray and for oiling the dough
- 2-4 tbsp Fresh rosemary
- Flaky salt
Instructions
- Mix. To a large bowl, add 2 cups All-purpose flour, 2 cups Whole wheat flour, 2 tsp Kosher salt, 2 tsp Instant yeast, 2 tbsp Extra virgin olive oil and 2 cups Lukewarm water. Mix with a wooden spoon until all the flour is hydrated. The mix should be shaggy but not sloppy.
- Rise. Drizzle some olive oil over the top of the dough, cover the bowl with plastic wrap or a tight-fitting cover and refrigerate overnight at least 18 hours.
- Deflate and shape. At least 2 hours before you want to bake the focaccia, take the bowl out of the fridge and uncover it. Using your hands or a dough scraper deflate the dough slightly and transfer the dough to a generously buttered and oiled baking tray (9×13) or sheet pan. Shape it loosely by grabbing each end and folding it over like you would a letter. Flip the dough over so the seams are on the bottom. Cover the tray with a towel and set aside for 1.5-2 hours.
- Dimple. Preheat your oven to 425F/220C. The dough should now have spread covering the surface of the baking tray. If not, you can help it stretch to the edges by carefully easing it to the corners. Drizzle more olive oil over the dough and start dimpling with your fingers, covering the entire surface. This creates valleys and mountains in the dough and you should also see air bubbles forming.
- Bake. Bake in the preheated oven for 20-25 minutes, until golden brown. Every oven is different, so your focaccia may need more time. Let the focaccia cool for 30 minutes before cutting into it.
Video
Notes
- Don’t Hurry the process. Allow the dough to rise in the fridge for at least 18 hours and you’ll need 2-4 hours for the second rise. The timing will depend on the temperature in your kitchen and how active the dough is. That being said, plan ahead!
- This recipe uses Instant yeast. But if you only have active dry yeast, you can bloom it in lukewarm water for 5 minutes before adding it to the dry ingredients.
Nutrition
Nutrition information is automatically calculated, so should only be used as an approximation.
 Like this recipe? Rate & comment below!
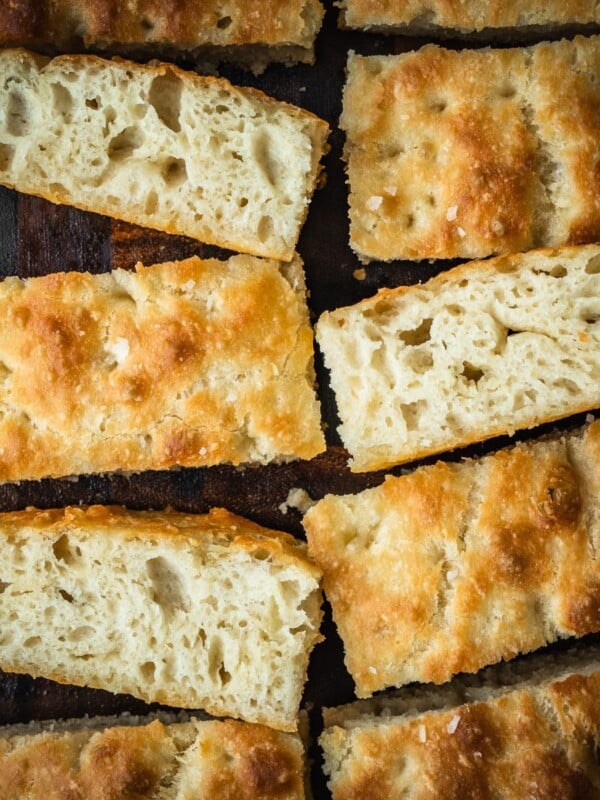



This is by far the best focaccia recipe I have ever made, and I have been making focaccia for over five years now. On mixing I was worried the dough was too wet, but his had the best rise and the most beautiful crumb of anything I’ve made. BAs recipe used to be my go to, but this has replaced it hands down (along with the regular no-knead focaccia recipe linked to here). I’m excited to work my way through more of Luay’s recipes. I appreciate when measurements are precise and not guessed after the fact.
Thank you so much Rachel!