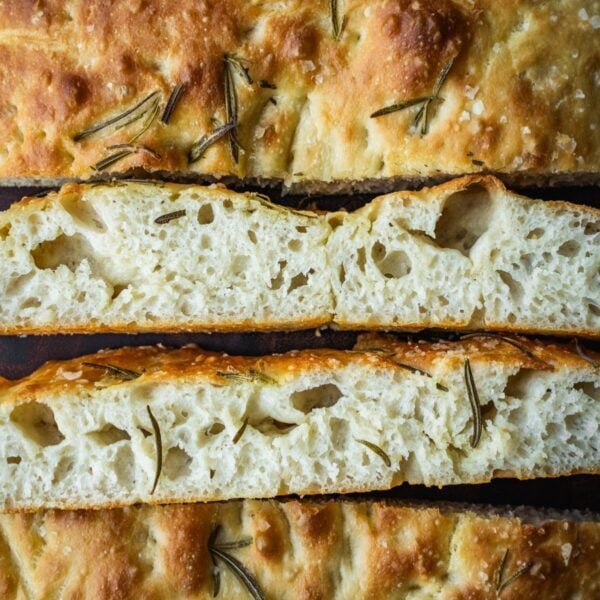
A great recipe for No Knead Focaccia that is sure to please the pickiest of eaters. This recipe does take some time to prepare (mostly hands-off) but the final baked focaccia will be worth the wait. The base recipe needs just 5 ingredients that you probably have in your pantry right now!
This post will cover everything you need to know about making overnight no-knead focaccia. If you need a SAME DAY option, try my Same-Day Focaccia recipe as the base. You’ll also find links below to my other focaccia recipes and flavor combinations. Baking for one? Try my Small Batch Focaccia in muffin form!

Table of Contents
- A Beginner’s Recipe
- No Knead vs Standard Focaccia
- Ingredients
- How to Make this No-Knead Focaccia Recipe
- Step by Step Video Tutorial
- Why You Should Use a Kitchen Scale
- No Knead Focaccia Recipe Variations
- Make Ahead, Storage and Freezing
- Expert Tips
- Recipe FAQs
- Other No Knead Baking Recipes
- The Ultimate No Knead Focaccia Recipe (Base Recipe)
Your Voice:
I’ve made this focaccia about six times now and it’s perfect every time. So fluffy! And it’s super easy to make.
– Katrien
A Beginner’s Recipe
I know that baking homemade bread can sometimes feel intimidating and out of reach. I used to feel this way years ago too. This recipe is perfect for beginners because:
- It doesn’t need any fancy equipment or tools. A large mixing bowl, a spoon, a baking tray and your fingers!
- No fancy techniques are needed. No sourdough starter to feed and worry about! No slapping or folding of dough! No complicated shaping or scoring.
- It’s very hands-off! The initial mixing is done in 5 minutes. Most of the work happens in the fridge overnight.
- It’s very rewarding. Trust me, you’ll be so incredibly proud of yourself.
Give some of my other no-knead baking recipes a try: No Knead Whole Wheat Bread, No Knead White Bread, No Knead Rosemary Parmesan Bread, Dark Chocolate Focaccia and Focaccia Pizza.
No Knead vs Standard Focaccia
So, what is the deal with no-knead? Both versions of focaccia can be delicious, and the choice between them often depends on personal preference and the amount of time and effort you’re willing to invest in the baking process.

I personally prefer the no-knead version because of the longer rise time which has many benefits:
- Enhanced Flavor and Texture: No-knead focaccia often has a distinct flavor because of the longer fermentation time, allowing the dough to develop complex flavors and a slightly tangy taste.
- Improved Digestibility: Slow fermentation allows the enzymes in the dough to break down complex carbohydrates and gluten, making the bread easier to digest. This can be especially beneficial for individuals with gluten sensitivities.
- Lower Gluten Content: While slow-rising bread does not become completely gluten-free, the prolonged fermentation process can break down some of the gluten proteins. For individuals with mild gluten sensitivities, this might make slow-rising bread more tolerable compared to bread made with quick-rise yeasts.
Baking a no-knead focaccia does take some time and proper planning, but the results are well worth it.
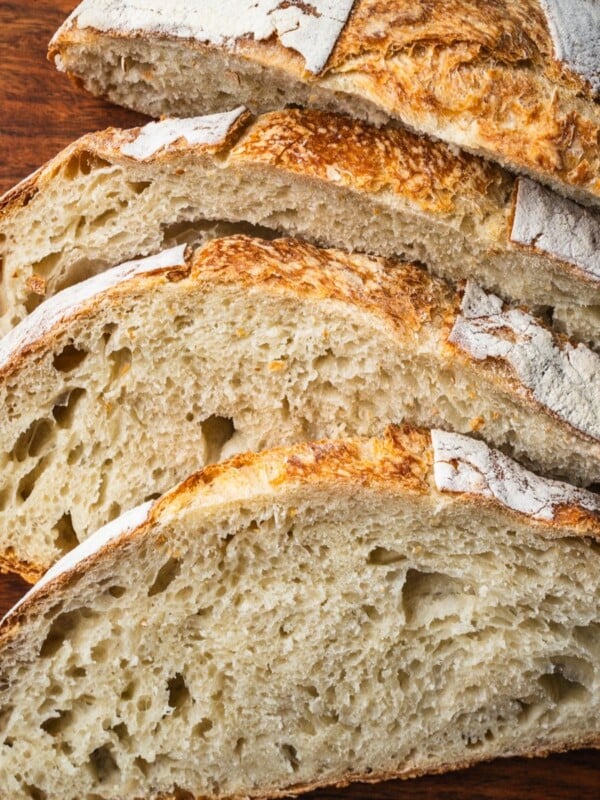
Ingredients
The recipe comes together with basic pantry staples.

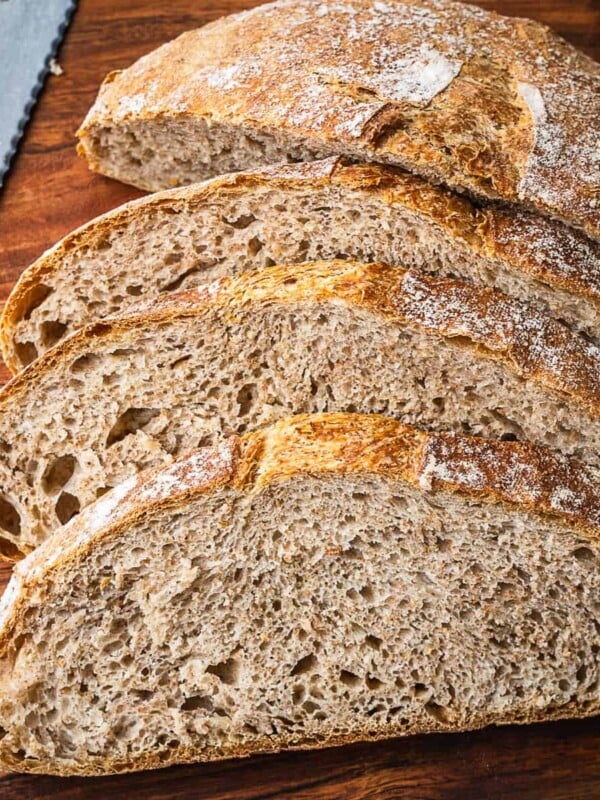
- Flour: I like to use 100% white all-purpose flour (unbleached preferred). However, feel free to sub in some whole wheat flour (up to 25% of the total flour amount). You can also use bread flour. You can use my whole wheat focaccia recipe as a base. And do try my Focaccia Barese recipe, which includes semolina flour and potato!
- Yeast: I like to use Instant yeast when making no knead bread, but dry active yeast will work just fine too. Just make sure to bloom it in the water for a few minutes before making the dough. You can also use fresh yeast but do adjust the quantity. When using fresh yeast instead of dry, use double the amount by weight.
- Olive Oil: It wouldn’t be a focaccia without olive oil. This recipe uses quite a bit of oil. You can reduce the amount slightly but keep in mind a traditional focaccia is supposed to be slightly oily. Good quality olive oil is a must. Or try my butter croissant focaccia instead!
- Fresh Herbs: The choice is yours here. I am using rosemary in this basic recipe, but if you check out my other no-knead focaccia recipes you’ll see that I use other herbs as well.
See the recipe card for full information on ingredients and quantities.
How to Make this No-Knead Focaccia Recipe
This is not a difficult recipe to make, but I encourage you to read through all the steps before starting so that you know what you’re in for.

1. Mix: To a large bowl, add the flour, salt, yeast, olive oil and room temperature water (Image 1). Mix with a wooden spoon until all the flour is hydrated. The mix should be shaggy but not sloppy (Image 2).
2. Rise: Drizzle some olive oil over the surface of the dough, cover the bowl with plastic wrap or a tight-fitting cover and refrigerate overnight (Images 3-4).

3. Deflate and shape: 2 hours before you want to bake the focaccia, take the bowl out of the fridge and uncover it (Image 5). Using your hands deflate the dough slightly and transfer the dough to an oiled baking tray (9×13) or sheet pan (Image 6). Shape it loosely by grabbing each end and folding it over like you would a letter. Flip the dough over so the seams are on the bottom (Image 7). Cover the tray with a towel and set aside for 1.5-2 hours (Image 8).

4. Dimple. Preheat your oven. The dough should now have spread covering the surface of the baking tray (Image 9). Drizzle more olive oil over the dough and start dimpling with your fingers, covering the entire surface. This creates valleys and mountains in the dough and you should also see some air bubbles forming (Image 10).
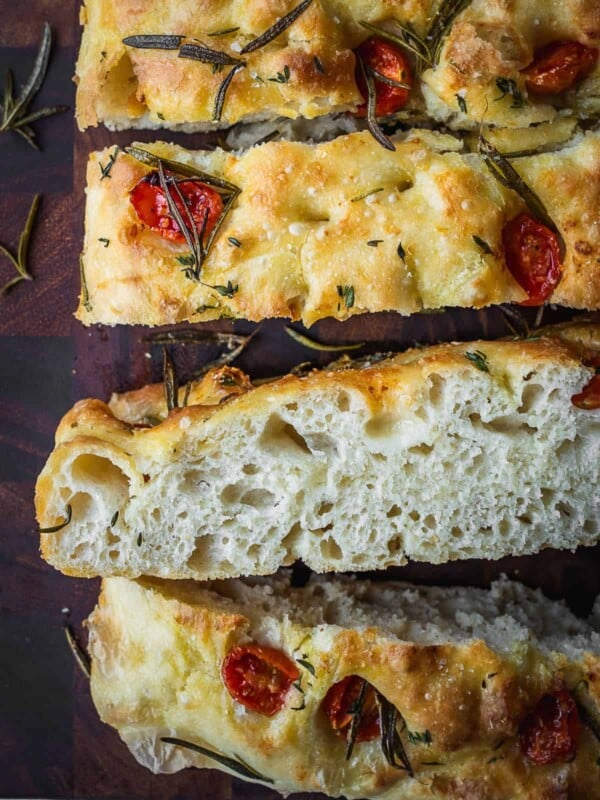
5. Dress. Nestle your rosemary and sprinkle with flaky salt (Image 11).
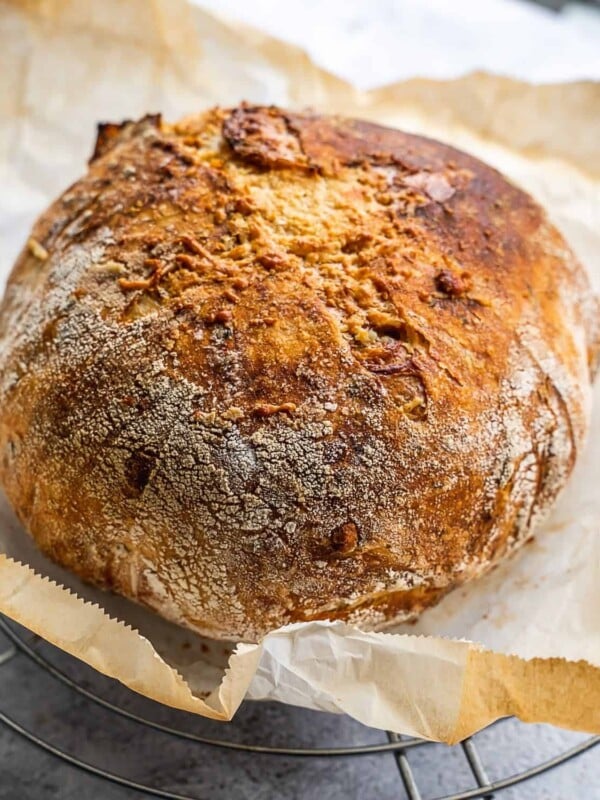
6. Bake. Bake in the preheated oven for 20-25 minutes, until golden brown (Image 12).
Step by Step Video Tutorial
Why You Should Use a Kitchen Scale
In this recipe, I provide both American (Imperial) measurements (cups and tea/tablespoons) as well as standard measurements by weight. I have tested this recipe at least 10 times by using a kitchen scale and it turns out beautifully every time.
If you were to use cups, you might not get an accurate measurement. For example, a standard cup of flour should weigh about 120 grams. However, depending on how you pack the flour, it can actually weigh upwards of 170 grams. That is a very large variation that will affect the final result.
This is why I strongly recommend that you use a kitchen scale when baking. You get a much more consistent result. They are not expensive. Check out this kitchen scale (affiliate link). It’s the one I use.
No Knead Focaccia Recipe Variations
This recipe and guide are the basis for my other no-knead focaccia recipes. Check them out or create your own flavor combinations! Or check out my roundup: 17 Delicious Homemade Focaccia Recipes for inspiration.


Make Ahead, Storage and Freezing
This is the ultimate make-ahead recipe because you can prepare the focaccia dough and refrigerate it for up to 2 days. Just make sure that it is covered so that it does not dry out.
Once baked, the focaccia can be stored in an airtight container in the fridge for up to 3 days. You can also freeze focaccia slices in freezer bags or freezer-safe containers for up to 6 months and reheat in the oven or toaster oven when want to enjoy it.
Expert Tips
- Don’t Hurry the process. Allow the dough to rise in the fridge for at least 18 hours and you’ll need 2-4 hours for the second rise. The timing will depend on the temperature in your kitchen and how active the dough is. That being said, plan ahead!
- Parchment paper: Line your baking sheet or baking pan with parchment paper for easy cleanup. Don’t use aluminum foil as it will stick to the bread!
- BUTTER THE PAN! Ok, this might be my best focaccia baking tip to date. Before you oil the pan, butter it. The butter creates a layer between the pan and the dough, making it so incredibly easy to remove the bread from the pan once baked.

Recipe FAQs
Yes, you can certainly use dried herbs when making focaccia. You can incorporate them into the dough itself or top your focaccia with them. Do be careful as dried herbs have a tendency to burn. So if you do use dried herbs, make sure to use them in conjunction with other ingredients like cheese.
Absolutely. The most famous sandwich shop in Florence uses focaccia bread sliced in half and split open to make the most delicious panini.
Other No Knead Baking Recipes
If you make this No Knead Focaccia or any of my other baking recipes on Urban Farm and Kitchen, please take a moment to rate the recipe ⭐⭐⭐⭐⭐ and leave a comment below. It’s such a help to others who want to try the recipe.
For more Urban Farm and Kitchen, follow along on Instagram, Facebook, and Pinterest, visit the Urban Farm Shop, or subscribe for new posts via email.
The Ultimate No Knead Focaccia Recipe (Base Recipe)
Equipment
- 9×13 Baking pan or large rimmed baking sheet – Affiliate link
- Kitchen Scale – Affiliate Link
Ingredients
For the Dough
- 4 cups All-purpose flour – 520 grams – Bread flour can also be used
- 2 teaspoon Kosher salt – 10 grams
- 2 teaspoon Instant yeast – 7 grams
- 2 tablespoon Extra virgin olive oil – 28 grams (Plus extra for drizzling)
- 2 cups Lukewarm water – 473 grams
For Baking and Garnish
- 1 tablespoon Butter – For greasing the pan
- ¼ cup Extra virgin olive oil, divided – for greasing the tray and for oiling the dough
- 2-4 tablespoon Fresh rosemary
- Flaky salt
Instructions
- Mix. To a large bowl, add 4 cups All-purpose flour, 2 teaspoon Kosher salt, 2 teaspoon Instant yeast, 2 tablespoon Extra virgin olive oil and 2 cups Lukewarm water. Mix with a wooden spoon until all the flour is hydrated. The mix should be shaggy but not sloppy.
- Rise. Drizzle some olive oil over the top of the dough, cover the bowl with plastic wrap or a tight-fitting cover and refrigerate overnight at least 18 hours.
- Deflate and shape. At least 2 hours before you want to bake the focaccia, take the bowl out of the fridge and uncover it. Using your hands or a dough scraper deflate the dough slightly and transfer the dough to a generously buttered and oiled baking tray (9×13) or sheet pan. Shape it loosely by grabbing each end and folding it over like you would a letter. Flip the dough over so the seams are on the bottom. Cover the tray with a towel and set aside for 1.5-2 hours.
- Dimple. Preheat your oven to 425F/220C. The dough should now have spread covering the surface of the baking tray. If not, you can help it stretch to the edges by carefully easing it to the corners. Drizzle more olive oil over the dough and start dimpling with your fingers, covering the entire surface. This creates valleys and mountains in the dough and you should also see air bubbles forming.
- Dress. Add a big pinch or two of flaky salt and the rosemary. Press in. Optional: At this point you can also add any other toppings you like. See some of my other recipes for inspiration: Tomato Focaccia, Jalapeno Cheddar Focaccia, Za'atar Olive Focaccia, Fig and Cheddar Focaccia.
- Bake. Bake in the preheated oven for 20-25 minutes, until golden brown. Every oven is different, so your focaccia may need more time. Let the focaccia cool for 30 minutes before cutting into it.
Video
Notes
- Don’t Hurry the process. Allow the dough to rise in the fridge for at least 18 hours and you’ll need 2-4 hours for the second rise. The timing will depend on the temperature in your kitchen and how active the dough is. That being said, plan ahead!
- This recipe uses Instant yeast. But if you only have active dry yeast, you can bloom it in lukewarm water for 5 minutes before adding it to the dry ingredients.
Nutrition
Nutrition information is automatically calculated, so should only be used as an approximation.
 Like this recipe? Rate & comment below!


This is a brilliant recipe. Very little work and perfect with the right texture
I mixed it one night and baked it on the second morning.
I used my own dried rosemary/sage salt on the top and it was delicious.
🫶🏾🫶🏾🫶🏾
Luay, A questions, I made dough yesterday. Have you left the dough in refrigerator longer than 18hrs, maybe 24? Do you know if that would cause an undesirable result ? Any thoughts on this would be appreciated. Thank you.
It can be left in the fridge for a couple of days.