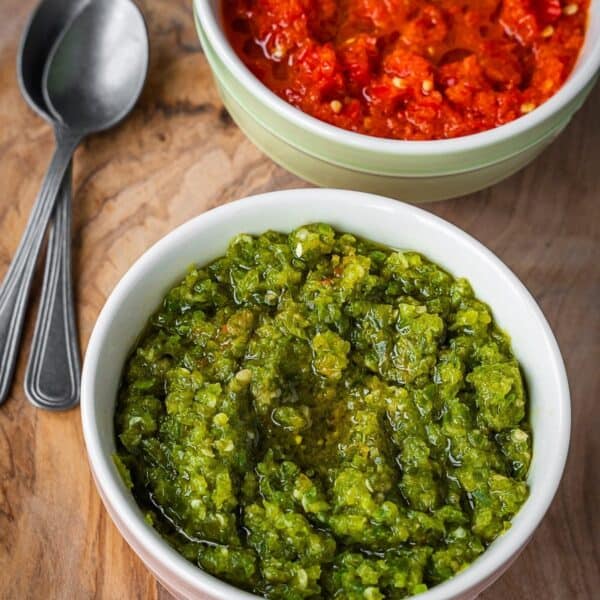
This truly authentic red and green Levantine Shatta recipe is my go-to when I have an abundance of peppers from the garden. Serve it with eggs, labneh, grilled meats and vegetables. There’s an optional fermentation step in this recipe which adds gorgeous flavor and balance to the finished condiment.
This recipe is featured in my ultimate 17 Homemade Condiments post.

Table of Contents
Red vs Green Shatta
There are two variations of this Middle Eastern chilli sauce. A green one made with green chiles and sweet peppers and a red one made with ripe hot red chillies and ripe sweet peppers. The combination and ratio of sweet to spicy is totally up to you. You can make this recipe entirely with hot peppers.
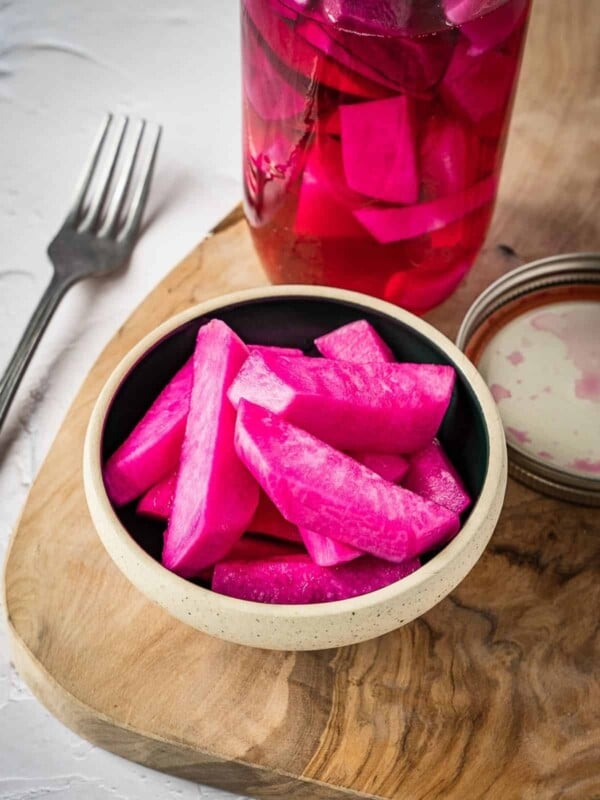
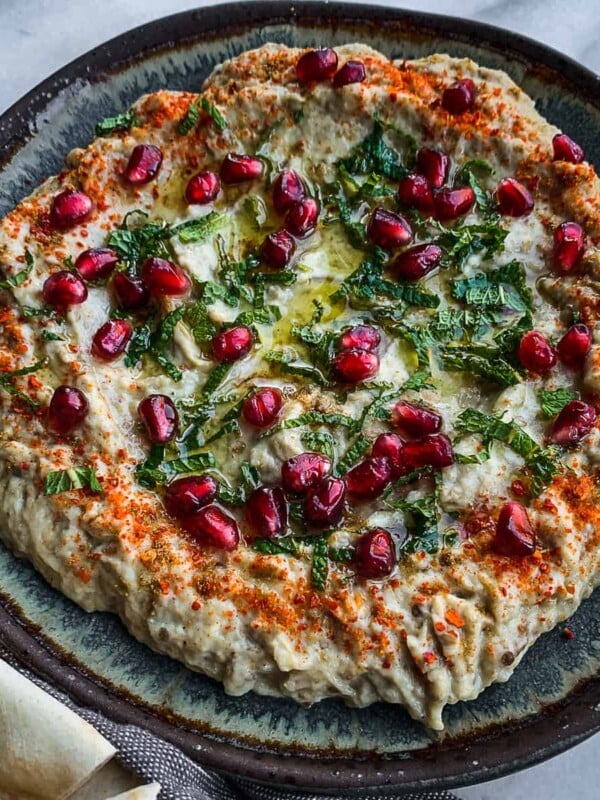
I have been making this recipe for years and you’ll even find it in my book, Seed to Table. I personally prefer to use a 50% spicy, 50% sweet ratio. The finished product will be much more flavorful and less fiery, meaning I can slather it on my Homemade Labneh, Eggplant Hummus, Mutabal, Mafghoussa, grilled meats and vegetables.
It also works great as a side to other main dishes like Maqluba, Maftoul and Zaatar Chicken.
Word of caution, don’t mix green and red peppers in the same batch. You’ll end up with a muddy brown-colored chili paste.

A Note on Fermentation
Fermentation, or more precisely lacto-fermentation, involves submerging vegetables and fruits in a brine solution (salt and water) or salting them enough to extract water to create their own brine. Rather than killing bacteria (like pickling typically does), this process takes a different approach.
The world is full of bad bacteria (e.g., Clostridium botulinum) and good bacteria (e.g., Lactobacillus). When done correctly, fermentation kills or suppresses the bad bacteria while giving the good bacteria a chance to thrive. This process transforms the vegetables and/or fruits into healthy, probiotic-rich lacto-fermented food.
If you’ve ever tasted kimchee (like Korean Radish Kimchi) or sauerkraut, you’ll notice they have an acidity to them that is different from a traditional pickle. They taste tangy as opposed to pickled. Furthermore, they may even tingle on your tongue. This fizziness is attributed to the carbon dioxide that is generated in the fermentation process.
This recipe includes a simple 3-day fermentation step. This step is optional but I think it will yield a much more flavorful and balanced finished product. Plus, it will draw out some of the moisture from the peppers which will concentrate the flavor.
My book, Seed to Table, also includes a fermentation primer and recipes for the beginner fermenter. I have an entire category dedicated to fermented food recipes including simple recipes like fermented radishes, fermented dill pickles, red cabbage sauerkraut, fermented tomatoes and fermented carrots.
Ingredients
This recipe uses fresh and simple ingredients.

- Hot peppers: My go-to hot chile pepper to make shatta is the jalapeno, which I have grown for over a decade. It grows really well in my garden, it’s easily available at farmers markets in the summer months and year-round at the grocery store. I use it when it’s green and when it’s ripe (red). Serrano peppers are also a great option, as are cayenne peppers and my favorite, Aleppo pepper. The world of peppers is immense. Experiment and have fun!
- Sweet peppers: Bell peppers work well here. Green bell peppers can be used for green shatta and red ones for red shatta. Other excellent varieties you can use include Sheppard, Bull’s Horn, cubanelle, and even poblano.
- Salt: When fermenting, it is important to use kosher salt, pickling salt, or sea salt. Avoid using table salt as it has iodine added to it which can possibly hinder fermentation.
- Vinegar: I like using neutral white distilled vinegar as it won’t affect the overall flavor, but feel free to use another acid like white wine vinegar, apple cider vinegar or even lemon juice. Avoid using dark vinegar like balsamic or red wine.
- Olive Oil: You’re not using much olive oil here, so go for the good stuff. Use extra virgin olive oil for a creamy, rich mouthfeel.
See the recipe card for full information on ingredients and quantities.
How Much Salt to Use by Weight
The amount of salt needed for fermentation varies depending on the type of food you are fermenting. The general rule of thumb is to use about 2 to 3% salt by weight of the vegetables or fruits being fermented. Here’s how you can calculate it:
- Weigh Your Vegetables/Fruits: Let’s say you have 350 grams of vegetables you want to ferment.
- Calculate the Salt Percentage: For a moderate salt concentration, you can use 3% salt. To find out how much salt you need, multiply the weight of your vegetables by 0.03 (which represents 3%).

So, in this case, you would need 10 grams of salt to achieve a 3% salt concentration. I recommend using a kitchen scale to achieve this level of precision. This salting process is also used to make Fermented Cabbage and Sambal Oelek (Indonesian chili paste).
How to Make Authentic Shatta Sauce

1. Salt the peppers. To a bowl, add your roughly chopped peppers and salt. Mix thoroughly to spread out the salt (use gloves). Let sit at room temperature so the salt can dissolve (Image 1). You should see some liquid at the bottom of the bowl after 30 minutes (Image 2).
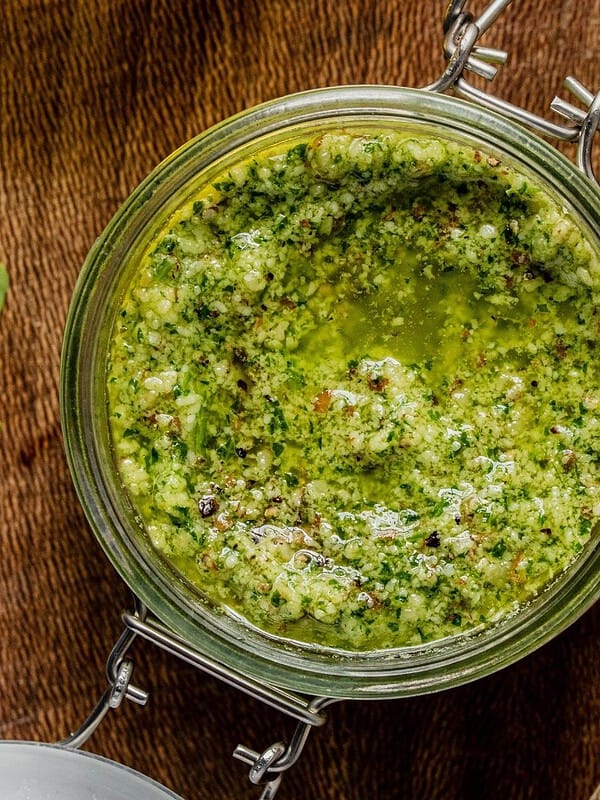
2. Add to jar. Transfer the salted peppers along with all the liquid to a clean mason jar (Image 3). Apply a fermentation weight (optional, but recommended). Press down to extract more liquid ensuring the peppers are covered (Image 4).

3. Ferment. Cover with a lid (or special fermentation lid). Leave the jar of peppers on a counter away from direct sunlight for 3 days, making sure to open and reclose the lid once a day to let any gasses escape. If you want to skip the fermentation step, store the jar in the fridge for 3 days instead (Image 5).
4. Drain and process. Using a sieve over a bowl, drain the chile peppers and process them in a food processor until you reach the desired consistency. This should be a little chunky (Image 6 and Image 7).
5. Season. Add the vinegar and olive oil and mix well. Taste and adjust the seasoning to your liking. Transfer the processed hot peppers to a clean mason jar or serving bowl. It shouldn’t need any more salt, but you can add more acid if you like (Image 8).
Expert Tips
- Use glass jars only. Avoid using any plastic or metal containers as those may react with the acid in this recipe. Glass mason jars are ideal in my opinion.
- Keep it clean. Sterilize your jars and utensils before using them to prevent unwanted bacterial growth. You can sterilize jars and tools by washing them in hot soapy water and then boiling them for 5 minutes.
- Wear gloves! Handling hot peppers and then touching your face or other part of your body is asking for trouble! When preparing the hot peppers, use latex or nitrile gloves to protect yourself.
- Remove the seeds. If you are worried it’ll be too spicy, you can remove the seeds and ribs from your hot peppers before salting them.
- Keep it chunky for authenticity. If you want to stay true to the authentic recipe, keep it chunky.
- Turn it into hot sauce. If you’re looking for a hot sauce consistency, blend it in a high-speed blender and then strain it in a fine mesh strainer. You might need to add more liquid to get a runny consistency that’s more in line with fermented hot sauce or chipotle hot sauce.
- Safety first. Make sure to refrigerate your final product in the fridge. Don’t leave it out on the counter.


Recipe FAQs
Shatta is a Levantine chili condiment that can be made at home or purchased from a grocery store. It is used just like any other chili sauce and gives a spicy kick to your favorite dishes.
If you follow this recipe, you can keep your homemade shatta in the fridge for several months, but I recommend using it up within 1 month.
This recipe is both gluten free and vegan!
Once you have finished making your shatta, you should store it in your fridge. It will keep in the fridge for several months, but I like to use it up within 1 month. The olive oil may solidify, and that’s completely normal. Leave the jar on the counter for 30 minutes before using it and the oil should liquefy again.
Shatta can be frozen in ice cube trays and transferred to a freezer bag for longer-term storage.
Other Levantine Sides
Levantine Recipes
Appetizers

Levantine Recipes
Levantine Recipes
If you make this Shatta (Authentic Middle Eastern Chile Paste) or any other fermentation recipe on Urban Farm and Kitchen, please take a moment to rate the recipe ⭐⭐⭐⭐⭐ and leave a comment below. It’s such a help to others who want to try the recipe.
For more Urban Farm and Kitchen, follow along on Instagram, Facebook, and Pinterest, visit the Urban Farm Shop, or subscribe for new posts via email.
Shatta (Authentic Middle Eastern Chile Paste)
Equipment
- Fermentation lid and weights – Optional
Ingredients
- 3 cups Peppers, roughly chopped – 350 grams
- 1 ½ teaspoon Kosher salt – 10 grams
- 1 tablespoon White vinegar – 15ml. You can also use lemon juice or apple cider vinegar
- 2-3 tablespoon Extra virgin olive oil – 30-45 ml
Instructions
- Salt the peppers. To a bowl, add your roughly chopped peppers and salt. Mix thoroughly to spread out the salt (use gloves). Make sure your salt ratio is as precise as possible. See note below. Let sit at room temperature for 30 minutes until you see some liquid at the bottom of the bowl.
- Transfer to jar. Transfer the salted peppers along with any liquid to a clean mason jar. Press the peppers down with a cocktail muddler or wooden spoon. Cover with a lid. You can use a fermentation lid and weights if you have them.
- Ferment. Leave the jar of peppers on a counter away from direct sunlight and in a cool place for 3 days, making sure to burp the jar (open and reclose the lid once a day to let any gasses escape – a fermentation lid doesn't need to be burped). If you want to skip the fermentation step, store the jar in the fridge for 3 days instead.
- Drain and process. Using a sieve over a bowl, drain the chile peppers and process them in a food processor until you reach the desired consistency. This should be a little chunky to be authentic.
- Season. Add the vinegar and olive oil and mix well. Taste and adjust the seasoning to your liking. Transfer the processed hot peppers to a clean mason jar
Video
Notes
- Weigh Your Vegetables/Fruits: Let’s say you have 350 grams of vegetables you want to ferment (as per this recipe)
- Calculate the Salt Percentage: For a moderate salt concentration, you can use 3% salt. To find out how much salt you need, multiply the weight of your vegetables by 0.03 (which represents 3%).
Nutrition
Nutrition information is automatically calculated, so should only be used as an approximation.
 Like this recipe? Rate & comment below!
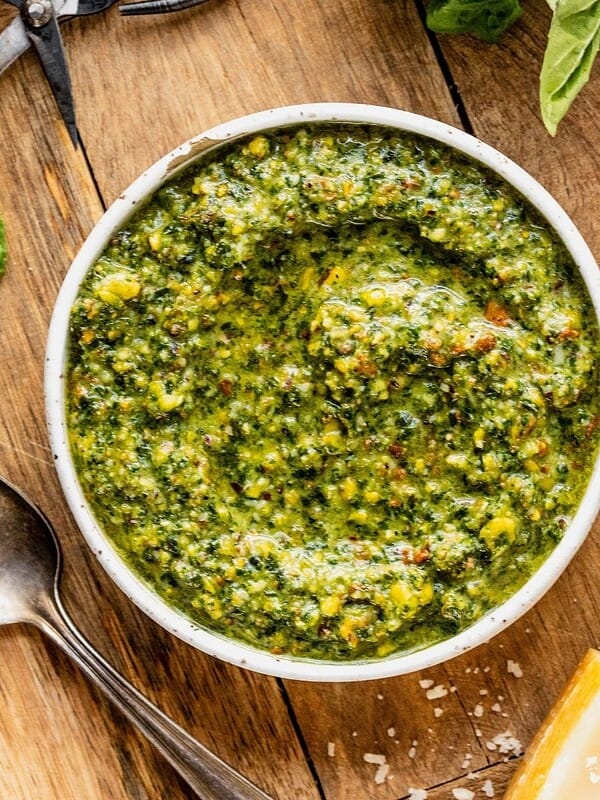


Hey Luay! Love your website. Chopped up a bunch of home grown jalapenos, pequins, padrons and poblanos. Salted at 3.5% and some liquid was released but no matter how much I squeeze them into the jar, there’s only a tablespoon of juice at the bottom of the jar. Should I make an additional 3% brine to cover the peppers or will that water it down too much?
You can certainly do that. As outlined in my other submersion fermentation recipes, I recommend a 3.5% salt solution. This translates to 3.5 grams of salt per 100 grams of water. A good place to start is 1 tablespoon of sea salt or kosher salt to 2 cups of water (which works out to 17g of salt to 475g of water – a 3.5% ratio).
Dead simple. Absolutely delicious. I’ve been looking for something more authentic for my falafel and shawarma and this is incredible… on everything!
Hey Danny! Thanks for the review. Glad you like the recipe!
Does it need to ferment for 3 days? How would the result be if fermented for only 2 days?
You can skip the fermenting step altogether as outlined in the recipe.
Could I hot water bath can this based on this recipe?
I don’t recommend it, there is not enough acid in this recipe for shelf-stability. Better to store in the fridge.